


Video Training / 3D Tuts & Design →Learn Solidworks Basic Part Modeling
Published by: E-Learning79 on 30-05-2024, 22:35 |  0
0
Free Download Learn Solidworks Basic Part Modeling
Published 5/2024
MP4 | Video: h264, 1280x720 | Audio: AAC, 44.1 KHz, 2 Ch
Language: English | Duration: 51m | Size: 475 MB
Junior Draughtsman
What you'll learn
Basic Part Modeling
3-D Features
Patterns
Sketch
Assembly (Mate)
Requirements
Technical Understanding of Technical Drawing
Description
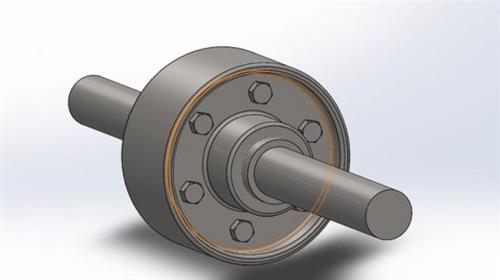
Drafting a flange coupling with SolidWorks can be an enriching experience. Here's a simplified step-by-step guide to help you get started:Open SolidWorks: Launch SolidWorks and create a new part file to begin your design.Sketch the Flange: Use the sketch tools to create the profile of your flange coupling. This typically involves drawing circles for the bolt holes and a larger circle for the outer diameter of the flange. Make sure to dimension your sketch appropriately for accuracy.Extrude the Sketch: Once your sketch is complete, use the Extrude feature to give your sketch depth and turn it into a 3D object. Specify the desired thickness for your flange.Add Bolt Holes: Create sketches for the bolt holes on the flange. These are typically evenly spaced around the circumference of the flange. Ensure they are properly dimensioned and aligned.Create the Shaft: Switch to a new sketch and draw the profile of the shaft that will connect to the flange coupling. This might be a simple circle or a more complex shape depending on your design requirements.Extrude the Shaft: Similar to the flange, use the Extrude feature to give depth to your shaft sketch and turn it into a 3D object. Make sure the length matches the desired dimensions.Combine Flange and Shaft: Utilize SolidWorks' assembly features to combine the flange and shaft into a single assembly. This involves positioning the flange and shaft correctly relative to each other.Add Detailing: Fine-tune your design by adding any additional features or details necessary for your flange coupling, such as chamfers, fillets, or text annotations.Review and Finalize: Take a moment to review your design, ensuring all dimensions are accurate and features are correctly positioned. Make any necessary adjustments.Save and Document: Once satisfied with your design, save your SolidWorks file and consider creating detailed documentation or drawings to accompany your design for future reference.Remember, this is a simplified guide, and there may be variations or additional steps depending on your specific design requirements. SolidWorks offers a plethora of tools and features to explore, so don't hesitate to experiment and learn as you go
Who this course is for
Solidworks Beginner
Homepage
https://www.udemy.com/course/learn-solidworks-basic-part-modeling/Buy Premium From My Links To Get Resumable Support,Max Speed & Support Me
No Password - Links are Interchangeable
Help Us Grow – Share, Support
We need your support to keep providing high-quality content and services. Here’s how you can help:
- Share Our Website on Social Media! 📱
Spread the word by sharing our website on your social media profiles. The more people who know about us, the better we can serve you with even more premium content! - Get a Premium Filehost Account from Website! 🚀
Tired of slow download speeds and waiting times? Upgrade to a Premium Filehost Account for faster downloads and priority access. Your purchase helps us maintain the site and continue providing excellent service.
Thank you for your continued support! Together, we can grow and improve the site for everyone. 🌐
Related News
-
{related-news}
Comments (0)

Information
Users of Guests are not allowed to comment this publication.
Search
Updates
Partner
» TutBB
» Byte
» Crawli
» Warezomen
» Warez-DDL
» Raidrush
» KATZCD
» Free Ebooks Library
Your Link Here ?
(Pagerank 4 or above)
» Byte
» Crawli
» Warezomen
» Warez-DDL
» Raidrush
» KATZCD
» Free Ebooks Library
Your Link Here ?
(Pagerank 4 or above)